Get the look: Olivia Palermo Monogrammed Shirt


Olivia Palermo is without a doubt one of the queens of the street style. Anything she wears is elevated to the category of must-have the moment she steps in the busy streets of New York. 

Recently I stumbled in an old pic by her featuring a monogrammed chambray shirt and I totally fell in love with it. She paired it with a pair of destroyed skinny jeans & gem encrusted navy slippers, a beautiful and comfortable combo for spring.

The shirt is from the celebrity-approved brand Rails (check their Insta account if you don´t believe me) and it will set you back 178$. If you want to get this shirt in your wardrobe asap click HERE! 


Braided Buns & Flower Crowns // Wedding Inspiration

There's something so beautiful about flower crowns that always feel attracted to them. Maybe it's how delicate they seem, that they make your feel like a forest fairy or that their color can brighten any outftit. I even like them more paired with braided buns, they are the perfect hair option for any outdoor event. I made a selection of the ones I have found over the years on the internet and that I love the most. With the wedding season just around the corner is the perfect timing to get inspired!


PS. If you need more inspiration, check my Braids & Crowns Pinterest Board.


*all images are from Tumblr & Pinterest. If you know the owner please tell me and I will credit them.

Cult Gaia - Ark Bag // The affordable must-have that has taken social media by storm


I am sure that by now you have probably seen more than one blogger, influencer, it-girl (you name it) carrying one of these beautiful bags. Luckily for you, this time around, the it-bag of the season is budget friendly with a 128$ tag. 

If you want to to get the Ark Bag by Cult Gaia you´d better run! It has been previously sold out and by the end of last year, it accumulated more than 1.800 preorders on the brand´s website.

Wondering what´s the reason behind that unusual shape and material? Cult Gaia's founder and CEO, Jasmin Lorian told to Who What Wear Australia the inspiration for the bamboo bag: "It´s a reproduction of a Japanese bag that was popular in the 40's".

So what are you waiting for to add this beauty to your wardrobe? Would you fall into the latest trend?Check the gallery below to get some inspiration on how to style it!


Rodarte SS17 - Get the look for less


Go bold or go home, that would be the best definition of the jewelry in the Rodarte SS17 fashion show. If you are not afraid of standing out and you want to elevate your bling bling accessories to the next level this trend is for you! 

The original earrings will cost you around 800$ (you can buy them here) but if you want to get the look without compromising your wallet, these ones with pearls from Stradivarius will only cost you 9$ plus you can wear them separately when you feel like toning down the look. 

Would you dare to try this trend? Leave your comments below! 

5 Tips for a Cozy Sunday


The weekend is just around the corner and this time I want to spend a cozy Sunday at home, just relaxing, sipping coffee or chai latte and reading a book under a big blanket.

I came across this pictures taken by @Heltenkelt on Instagram and they inspired me to make a post with the five things that help me to relax during a weekend at home.

#1. Make a big cup of chai latte (you can follow this easy recipe of Buzzfeed to make it)

#2. Wear a chunky sweater over my pajamas to get an extra warm feeling (this one from Urban Outfitters is perfect for this!)

#3. Turn off any electronic devices I might have around me and grab a book, right now I am reading The Girl on the Train by Paula Hawkins. If you like thrillers, this one is for you!

#4. Take a relaxing bath or shower. When I have some extra time I like to use an aromatic oil to moisturize my skin and de-stress with the smell it leaves in the bathroom mixed with the steam of the hot water. The Relax Oil by Clarins is an amazing option!

#5. Indulge yourself and eat your favorite snacks. Once in a week, it is totally fine to do this and not feel guilty about it! So sit back and enjoy them!

Brow Gels Guide & Comparison


So as you might have seen from other posts, I like to take care of my eyebrows. I don't know why but I like them to stay in place all day so I've been using brow gel for many many years now. My brows have been from very thin to thick and natural but I've always used a gel to keep them groomed.

I've tried a lot of them and I wanted to make a small guide and comparison to help you choose which one will be the best option for you the next time you go to a beauty counter! The list goes in descending order from my top favorite to the least one.

1. Brow Gel by Nars 

My favorite, yet the most expensive one :( I really like this one, it has a strong hold, keeps my eyebrows in place all day long and dries to a natural finish. It doesn't leave a sticky feeling even though if you touch your brows you can fell it's there. It has a small sized classic groupillon and is super easy to shape your brows with it. There's also three different colors available, apart from the clear gel, which help to define a bit more the brows. The only downside of this product is that you have to wipe the wand off to avoid getting too much gel on the brows.

-----------------------------------------------------

2. Speed Brow by Benefit 

After Nars this is my second favorite. It also makes my brows stay in place all day and its small brush makes the application really easy. This one doesn't have the "too much product on the brush" problem but (an here comes the reason why it's not my favorite) it finish up really soon. Seriously sometimes I think some bushy brows fairy comes at night and uses it while I sleep! And since it's so expensive, I don't like to repurchase this so often and splurge so much money on a brow gel almost every month. That's why I have tried so many different ones. Still I totally recommend it if you don't mind to repurchase it often. Also is the perfect size to carry it in your bag and the packaging is the cutest one of the seven gels (as always happens with Benefit's products).

-----------------------------------------------------

3. Lash & Brow Gel Mascara by Essence 

This is the cheapest option of the bunch. Is an ok product, not my favorite but good enough for its price. It has a classic groupillon that can be used on brows or eyelashes. It doesn't curve my lashes and since it doesn't have color I just use it for my brows. You should be careful since there's a lot of product on the brush and you may end up with gel all around the brows area. It's not a super strong hold but it has a natural (not shiny) finish that you might like if you just need a little help to groom your brows and set any other product you may have used on them like a pencil or powder. This one is my favorite low cost gel.

-----------------------------------------------------

4. Brow Drama Mascara (clear gel) by Maybelline

I've tried their color version twice on the shop and ended up buying the clear option since I already have bushy brows, but it turned out to be a bad decision. While the colored version did fix my brows, the clear gel is not strong enough (at least for my taste) and it doesn't hold my brows in place for more than two hours. After that time I can no longer feel the product on the small hairs. If you want to try this one I advise you to choose the color that matches your hair since it will give you the illusion of bolder brows and will help you to keep them in place.

Get your tan on!


Summer is here! but for some of us our vacations are still a bit far away... Still, there are some things you can do to trick your body and mind to feel like you are on holidays. For example, getting a fake tan!

They used to be sticky, smelly and hard to use, but the new generation of self-tanners will get you the best tan you ever dreamed of without having to spend hours under the sun. 

1. BODY: To get a natural tan, use a gradual lotion that will develop over the days, just like if you were on holidays on the beach. St. Tropez Gradual Tan in Shower Lotion is really easy to use. You only need to let it on your skin for three minutes and then wash it off. You'll see your tan develop in a few days. 

Remember to exfoliate and wax 24 hours before using any self-tanning product. Also remember to moisturise hands, feet and elbows so you won't get any patches on those areas. Don't forget to moisturise daily to make the tan last longer, exfoliate your whole body after four days and re-apply the lotion to get a fresh tan again.

2. FACE: Most people doesn't like to use a self-tanning lotion on their faces because they think they will get a break out or similar. But there are amazing new formulas that doesn't feel greasy on the skin and that help you to develop a sunkissed look easily. The Gradual Self-Tanning Face Water by Sephora or the Self Tan Luxe Facial Oil by St. Tropez are both great options to gradually obtain the desired tan on your face.

PS. Click on the names to shop the products.


Get the Look for Less: Burgundy & Leopard Print


The moment I saw this picture I was totally drawn by its colors. The outfit is perfect, stylish yet comfy and the contrast between the burgundy and the deep blue colors makes it to stand out even more. I can imagine this woman wearing this look to the office, or maybe to grab a coffe with some friends or even to go out for dinner. 

You can wear it with flats or spice it up with a pair of high heels and a big necklace, it's really versatile. Also you can combine the separate pieces to create many different outfits. If you want to get this look, click on the links below!


1. MOTO Burgundy Cord Jamie Jeans, by Topshop


Top picture by: theurbanspotter.com

Top 3 Beauty Brands in Etsy


1. FRENCH GIRL ORGANICS

There's something so pretty about this brand! Its name, the packaging and the lovely products it makes, all of them inspired by their travels to France. Besides, all their product range is 100% organic and not tested on animals. I can't wait to try their Café Noir Polish, this shower scrub has energizing properties and leaves your skin silky smooth (win win!).


2. FOR STRANGE WOMEN

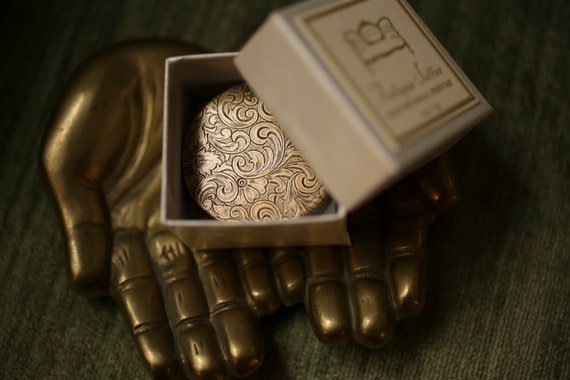
As its name says, it may not be everyone's cup of tea kind of brand but there's not denial that their packaging and pictures are simply amazing. Their owners are inspired by antiquarian style and past eras and use natural and organic ingredients to create sumptuous perfumes and cosmetics. If you like unique scents, this is your shop!


3. THE BLACK SHEEP SOAP COMPANY

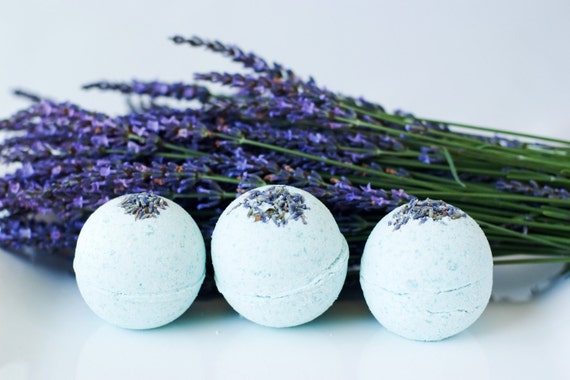
This shop, based in Cali, makes the bath time even more enjoyable. In their shop you can find from bath bombs to creams in a wide variety of scents: lavender, eucalyptus, lemon and so on. All their products are handmade and very affordable! Make the most out of your bath time and add one of their bath bombs to the water, the oils they contain will leave your skin soft and non-greasy.


* Have you ever bought a beauty product in Etsy? How was your experience? Any recommendations? I would love to read your opinions in the comments section!  // Click on the shop names for the link.

Happy 2016!


New year, new start! I have been thinking about this for a long time now and this seems like the perfect day to start all over again. 2015 was a crazy year, full of amazing things but all what happened kept me away from the blog and I have missed it. 

Now that my life seems to be back on track (kind of) I want to write again. This time the blog won´t be focus just on beauty. I want to share all my interests with you which include beauty, fashion, design & decoration. 

In order to match this new direction, I have revamped the blog design. Still I will keep all my old posts so you can check them out whenever you want. I hope you like it!

Welcome again to The Glow Lab!


image source: instagram @anastasia_volkova

Miracle Skin Perfector Roll - On BB Cream by Garnier // Review & Comparison


Today I bring you a different kind of review. This one is a comparison between two same products, the old versus the new version of the Miracle Skin Perfector Roll - On BB Cream by Garnier (yes, that's quite a long name!)

It has been one of my go to products for some years now and the original one, the one on the right side, lasted so so long that I'm even ashamed to admit for how many years (there was no way to finish it! I promise) it has been on my makeup stash.

So when I finally decided to upgrade it to the new version and toss the old one, I was quite disappointed to find that the new one was quite different. Specially I was surprised by the color change since I'm really pale and the new version is darker than its predecessor.


So after seeing some differences more I thought that this review might be helpful to those of you who might still be using the old version and want to grab the new one.

Color: As pictured, on the right side you can see version 2.0, darker and with a pinker hue. On the left, version 1.0, lighter and more on the yellow side.

Roll-On: The new roll on is smaller, I suppose this is to make it more precise but the older version had enough precision. Also I have seen that this new roll-on makes the product to come out even when the cap is closed so everytime I open it there's product everywhere.

Consistency: Not much difference in this section but I would say that the newer version is more liquid while the older one was a bit thicker.

Durability: The new one doesn't last on me more than two to three hours... I don't know why but the original one lasted waaaay more on my skin. This is the biggest no-no for me of this upgraded product.

Definitely I preferred the old version better so now I am looking for a new go-to concealer that doesn't involve the use of brushes. Any suggestions? Which one do you use?

Nude Lips - How To // Tutorial - Labios Nude


I haven't made a specific lip post in a while and yesterday I decided to make a new one. This time, instead of using bold colors I created a nude lip inspired by Kylie Jenner and the 90's. If you want to know how to get these lips and the products I've used, just keep reading!

1. First, line your lips with the Lip Pencil in Soar by M·A·C. To create a "fuller lips" effect you can slighly overdraw your lips and make a rounded cupid's bow. 

2. With the same lip pencil fill 2/3 of the lips, leaving the inner part untouched. Then apply the lipstick in the color Twig by M·A·C. 

3. To add more dimension to the look I dabbed a lighter nude lipstick in the center of the lips. I used Honolulu Honey's Lipstick by NARS but you can even use some concealer to get the same effect. 

4. To finish the look, add a high shine lipgloss just on the center of the lips. I applied Dior Addict Lip Maximizer which doesn't leave any sticky feeling and it's supposed to plump your lips and give them even more volume! 

Just follow these four easy steps and you're done! I really like to wear this lip combo when I'm wearing bolder eye looks. I hope you like it as much as I do. Kisses!

PS. Tomorrow I'll answer all the comments since these past weeks I almost haven't had time to do anything. I don't want you to think that I've forgotten you!


Finished Products of March


BB Cream Oil Free by Garnier (7,99€): It's a classic in my stash already. I've probably used more than four tubes already and I always buy a new one. It works great with my skin, but only this version (the one for oily and combination skin types), the classic one just doesn't settle on my skin and moves all around. It has medium coverage so if you're looking for a light tough of color this one is definitely not for you. I use it instead of foundation since it's way cheaper and makes my skin look great without effort. I apply it with the stippling brush from Real Techniques and blends really well with my skin so probably for darker skintones this color is a bit too fair. I totally recommend this product, just find the version that works best for your skin type and I'm sure you'll love it as much as I do. Of course when I run out of the next tube I'll buy another one!

Skin Natural BB Eyes Roll On by Garnier (5,95€): It has been my go to concealer on an everyday basis whenever I was in a rush but it was really old (it probably has 2+ years! I know I should be ashamed!) and I thought that it was time to change it for the new version. It's a product that lasts for ages, seriously! I was amazed of how much product fitted into such a small bottle like this one. I applied it over my dark circles and around the nose area (where I have some redness) and it blended seamlessly with my skin. I've bought the new version and the color is darker and doesn't match my skin as well as this one so probably I won't be able to use it alone for a quick touch up. I'll make a review soon with a comparison between the old and the new version so you'll ble able to see the differences but for now I'll just say that I wish they have kept the old version...

Smoky Lash Mascara by Make Up Forever (23$): I bought this mascara after getting tored of using the Diorshow one. It's a lovely product that elongates and curves the lashes, it doesn't leave your lashes crunchy and it doesn't flake (at least on me). Overall I would say it's a great mascara but I'm still trying to find THE ONE. I won't be buying it again at least for now since it is pretty expensive and I have another ones to finish, but in the future I'll probably end up buying another tube since I was happy of how my lashes looked with it.

Rice Scrub by Rituals (10€): I got this as a sample with Glamour magazine and I fell in love with it! It has a nice, fresh scent, not too sweet so I feel it's a great product to take it with you and use it while you shower. It has small microcapsules that gently exfoliate your skin without being too harsh. That makes it the perfect body exfoliant to use more than once a week, it's even appropriate for sensitive skins! I'll probably buy the full size bottle the next time I visit one of their shops.

Powder Blush in Mauve by NYX // Full Review & Swatches


Since NYX has been discontinued from many many stores in Spain, I grabbed this blush with a 50% off (it usually costs 5$). I wanted something subtle and natural and this color seemed to have both characteristics. 

As you can see on the pictures is a muted pink with a matte finish, which is perfect when you don't want an extra touch of shine on your face. It's not highly pigmented so you have to modulate its color by applying more than one layer. To get the color on my hand I applied exactly 3 layers.

I've made a swatch with two other blushes, Orgasm by Nars and Coralista by Benefit, so you can see how matte this color is and how natural it looks next to two coral colors. 

It has a soft texture and is easy to blend on the skin, that makes it really easy to apply without going overboard. I think is a great shade for very fair to medium skin tones, it will help you to achieve a healthy natural look, perfect for an everyday makeup. 

It stays on me around seven hours (with foundation underneath) which is a great amount of time. The package isn't luxurious at all but is nice for its cost. Still I think that if you drop it it will break so you better be careful with it. 

Well that was all about the Powder Blush in Mauve by NYX! Do you have any blush from this brand? Have you tried this color or something similar? Which is your go to blush shade? Kisses!


Cut Crease Makeup Look


If you follow me on Instagram you probably saw this look yesterday. It's my first attempt ever on a cut crease makeup look and even though I know that I have to improve a lot, I was quite happy with how it turned out.

I was browsing through Pinterest and saw some looks made with this technique si I decided to give it a try, but it turned out to be harder than expected. Next time I'll make the flick on the end a bit higher to open up the eyes more. Anyway, here are the products I used to get this look:

EYES


Eyebrow Pencil in 2 by Yves Saint Laurent

LIPS


FACE


PS. As always, click on the product's name if you want to buy it.

I hope you like the look! I'll try to make a full tutorial when I'm more confident with this technique. I hope you all have a lovely Sunday! Kisses 


Studio Fix Foundation by M·A·C // Full Review


The last time I visited a M·A·C counter, I received a small sample of their Studio Fix Foundation that I was willing to try. They gave me the shade NC20 which was an almost perfect match.

It's a liquid foundation but with some consistency so it's easy to apply with a brush like the Stippling brush from Real Techniques. It has a medium to almost full coverage, if you build up the product you will cover practically any pimple or dark circles you have. Still if you want to fully cover any imperfection you may need an extra touch of concealer. 

It has a matte finish that looks beautiful on pictures but if you have some dry patches it may enhace them. If you have normal to combination skin it will look great on you. It doesn't look cakey if you apply thin layers and after some hours it sill looks great with no shine or oxidization around.

Its costs 30,50 € which is an ok price for this foundation. Not extremely expensive yet not too cheap which is the cost I expect from M·A·C  products. I did like it, but I had the feeling that it was a bit drying for my skin and enhaced some skin imperfection. I'll try another foundations from M·A·C before I pick one to see if there are any other formulas that adapt best to my skin.

PROS

- Great coverage without feeling a mask on your skin.

- A wide range of colors available.

- Easy to apply, you don't need too much product to cover your entire face.

- Its lasts for more than 8 hours without moving.

- Photographs beautifully.

CONS

- A bit drying.

- It enhances skin texture imperfections.


Liebster Awards!


I hope you had a great Monday! I got two new Liebster awards and since they think they're a great way to know a bit more about the people behind the blogs, here are my answers to both.

I got my first nomination from Mónica, check her lovely blog El rincón de Mónica. She's such a sweetheart and always answers all your doubts about products and beauty problems. Thank you Monica, you always leave the nicest comments!

1. You never go out of home without... keys, phone and wallet!

2. If you had to live on another country, which would it be? It would be New York, in the USA.

3. Your work or education is related with your blog? Yes, the master I did was related to the fashion and beauty industry :)

4. Would you like to expand your blog and talk about other subjects apart from beauty? I'm comfortable with what I'm doing now but I will probably expand it in the future. I would love to share stuff about fashion and also about travelling (which are my other passions).

5. Which is your favorite season? Summer! 

My second nomination is from Genevieve, her blog Vievelle is so so pretty! You should check it out! I think it's like a beauty oasis, I feel so calm when I scroll through her posts and read them. And she's also super nice :)

1. Favourite song and or artist? I don't have any favorite song because I like so so many! But right now I'm obsessed with Sugar by Maroon 5 (and Adam Levine!)

2. If you had to wear one shade of lipstick for the rest of you life, which would it be? I would go for Dior Addict Lip Glow in Pink. It creates a unique shade on your lips which is really natural and also works as a lip balm so I would stick to this one product. But I would miss so much the reds!

3. Which are you more likely to splurge on, eyeshadow or lipstick or foundation? Mmmm... Probably the most expensive cosmetics I own are foundations but if I do a makeup haul I splurge on eyeshadows. I usually fall in love with all the colors!

4. If you had to choose a case for your phone that would last for the next 3 years, and the colours you can select from are red, orange, yellow, green, blue, violet, and indigo, which colour? I think I would choose the red one, depending on the exact shade.

5. You have $5 and are at your local drug store buying gum, and spot a great deal on Charlotte Tilbury products. The lipstick shade you have been eyeing is on sale, there is only ONE left and you get the feeling it won't be there for long. However, you didn't plan on this happening and you left you wallet with the bulk of you money at home. What do you do? 

a) Run as fast as you can home for your wallet.

b) Take the lipstick, hide it somewhere in the store, then go home for your wallet, knowing that your prize is safe.

c) Call you friend to drop everything and get to the store now.

I choose b! I'll hide it somewhere nobody will find it! hahahaha

6. What would you do if you were accidentally left in a department store overnight after they closed? Mmmm... first I will freak out and call somebody to help me, then if I couldn't get out I would look for a couch to sleep in after walking all around and checking the shops. It must be a weird feeling to be all alone in  a department store! 

7. What was your worst make up emergency (smeared eyeliner, runny mascara) in public and how did you fix it? The only two situations I can think of right now is red lipstick on the teeth (that I just take away with my fingers) and getting a "mask" effect with badly applied foundation. To fix this second situation I will just use my fingers to spread the foundation a bit more to the neck to try to conceal the darker color.

8. Favourite eyeshadow look? Brown smokey eye with black eyeliner and mascara.

9. If you could only drink one tea/coffee for the next 5 years, what would it be? A white chocolate mocha from Starbucks.

10. What food would you choose if you had to eat only that food for a week? Pasta, because you can make different kind of recipes with it.

11. What is one beauty product that will always have a place in your purse? In my purse I think concealer and lipbalm.

These are all my answers, I hope you have enjoyed them! These are my five nominees: Sobre Todo Reviews // Oh Calíope // 76ist // Linda Libra Loca // Emily Jane Webb

And these are my five questions for them:

1. What's your favourite lipstick?

2. Do you have a signature perfume?

3. If you could pack your luggage and travel anywhere right now, where would you go?

4. What was the last beauty product you buy, that you regret buying?

5. Do you have a beauty icon?

Kisses!

Giveaway Winner! // Ganadora del Sorteo!


Hello everyone! Before I announce the winner of the giveaway I just wanted to explain why I've been missing this last week, and it's because I got an internship! Everything happened super fast so I didn't have  time to prepare some posts to publish them during the week but next week I'll try to post more often since I want to share a lot of stuff with you, I just need to adapt to my new schedule and I'll be back on track, I promise :)

And now... let's see who will take the giveaway home! And the WINNER is...

Number 12 - Hi My Name is Judit!


Congratulations Judit :) I hope you enjoy the gift! Please contact me through this email so I can contact you and send you the package:


Thanks to everyone who participated for giving me so many ideas, I hope I can make more giveaways so all of you get the chance to be the winners. Kisses and enjoy the weekend!

____________________________________________________________


Hola a todas! Antes de anunciar a la ganadora del sorteo, quería explicar por qué he estado desaparecida esta ultima semana, y es porque he comenzado unas prácticas! Todo ha  sido muy rápido así que no me ha dado tiempo a preparar unos cuantos posts para ir publicándolos durante la semana, pero la semana que viene intentaré publicar con más frecuencia ya que quier compartir con vosotras un montón de cosas. Sólo necesito adaptarme a mis nuevos horarios y volveré a la rutina de antes, lo prometo :)

Y ahora... veamos quien se lleva el premio del sorteo a casa! Y la GANADORA es...

El nº12 - Hi My Name Is Judit!

Enhorabuena guapa :) Espero que disfrutes del regalo! Por favor, ponte en contacto conmigo a través de este email así te lo puedo enviar:

theglowlab@gmail.com

Gracias a todas las que participasteis por dar todas las ideas, espero poder ir haciendo más en el futuro para que todas tengáis la oportunidad de que os toque algo! Un besito y a disfrutar del finde.

Red Lips - Look 2: Golden Hour (Pleasure Me Red by Maybelline)

 photo golden hour header_zpsbvdysyqt.jpg For this second red lips look I opted for a classic golden eye combined with deep red lips, exactly the shade Pleasure Me Red by Maybelline. This is a look I would wear to a formal dinner or event and during Christmas holidays. This look has some more steps than the other one since I added a bit of contouring to add some depth to my cheeks. I hope you enjoy the step by step guide!

I started by applying foundation to even my face. I used the Studio Fix Fluid in NC20 by M·A·C and applied it with the Stippling Brush by Real Techniques. I'll do a review on this foundation later this week so stay tuned!

After that I prepped the eyes with an eyeshadow base (Smudge Proof Eyeshadow Base by Nars) to make the eyeshadows last longer. And then the steps begin!

 photo step12_zpspz1u4ior.jpg
1. Apply with your own fingers the Color Tattoo eyeshadow in 75 - 24K Gold by Maybelline. This will create a golden shiny base that will last for hours.

2. With the brush PRO-62 by Burlesque go over it with the S2 Gold Gleam shadow by Shiseido. I know this shade is discontinued so you can use any other powder gold eyeshadow instead.

 photo step34_zpsktkngbgp.jpg
3. From the Tamanna Palette by Anastasia Beverly Hills (you can read my review here) take Gilded (a vintage gold) to add some depth to the crease, and apply it with the brush Eyes 212 by Kiko. The flat shape of this brush adapts to the crease and makes it easier to apply the eyeshadow on that area.

4. From the same palette take Chocolate (a deep dark brown) and go over Gilded to add even more depth to the outer crease. I used the 219 brush by M·A·C which has a pointed shape that allows you to control exactly where you put the eyeshadow. Then, blend with the brush 217 by M·A·C.

 photo step56_zpsxtg71azj.jpg
5. To even out the skintone under the browbone and create a softer crease cut, apply the Microshadow in Desert by Make Up Store (you can read the review here) with the fluffy brush 213 Eyes by Kiko.

6. Time to add some eyeliner! I used the Felt Tip Liner in Jet Black by NYX and darkened it with the Noir Eyeshadow from the Tamanna Palette (I used the 228 brush by M·A·C for this).

 photo step 78_zpsrj7bru9c.jpg
7. Under the lower lash line, use a brown liner to define your eyes a bit more without going overboard. For this I used the Eyebrow Pencil in 2 by YSL. Also add mascara on your top lashes, you can use whatever you want, in this look I opted for the Passioneyes Mascara by D&G.

8. This time I wanted some really natural brows so I just brushed and fixed them with the Brow Gel by Nars, but if you want to you can draw them or shape them however you want.

 photo step910_zpsvtvifm0z.jpg 9. Highlight the browbone with Nylon by M·A·C. You can use any other highlight shade you own but if you haven't got one, this is a beautiful shade and I recommend you to try it the next time you visit a M·A·C counter. I used the 239 Eye Shader brush by M·A·C for this. 

10. The final step for the eyes is concealer. I used my Pro Longwear Concealer in NC20 by M·A·C and applied it under the eyes with the Concealer Brush by Beter. Then I blended everything with the Stippling Brush by Real Techniques which still had some foundation left.

 photo step 1112_zpsxybiohn3.jpg
11. Contour your cheeks with the Contour Kit by Anastasia Beverly Hills (read the review here). Apply the color Fawn with the PRO-39 brush by Burlesque under the cheekbone and then highlight the undereye area with the shade Banana from the same palette with the 190 brush by M·A·C. I know it's a foundation brush but it's flat surface helped me to press on the powder shade on the skin.

12. To add a pop of colour on the cheeks use the Angled Blush Brush 40 by Sephora and softly apply the Powder Blush in Mauve by NYX from the apples of your cheeks up to the highest part of your cheekbones.

 photo step 1314_zpsgihqzwyg.jpg
13. The final steps: the lips! First draw your mouth with the Cherry Lip Pencil by M·A·C. You can fill in your lips to make your lipstick stay longer.

14. Finish the look with the Lipstick in Pleasure Me Red by Maybelline. I applied it directly from the tube ut you can use a lip brush to create sharper lines.


I hope you have enjoyed this new look from the Red Lipsticks Series and I hope you use the tutorial to recreate this makeup at home. At the end of the post you can find a big picture with all the steps together so you can save it or Pin it to use it as a reference in the future. Do you have any specific look or idea that you would like to see on the next tutorial? Please tell me in the comments! Kisses and I hope you start the week with energy!

PS: As always, click on the names of the products to buy them.


New In! Brow Satin by Maybelline - Review // Reseña

This is the last week to enter my GIVEAWAY! Click here to participate! // Ésta es la última semana para participar en el SORTEO! Haz click aquí para entrar!

Recently Maybelline released a new brow product, the Brow Satin. Is a double ended plastic pencil which has 2 products in 1, a liner and an eyeshadow. The wax liner is very skinny, perfect to fill in gaps and define the shape of your brows a little more. The shadow comes out of an sponge, it gives a soft and natural look to the brow and also sets the pencil. 

It comes in four different colors: dark blonde, medium brown, dark brown and mahogany red. I picked up dark brown and it matches my hair perfectly. The formula is water resistant from what I've tried, I wouldn't say that is waterproof but I can assure you that your brows won't melt under the rain!

It's really easy to use, if you turn it, the pencil comes out and you can easily draw small hairs. The sponge fills itself with more eyeshadow everytime you push it in. I have some doubts with this auto-filling design, I'm not sure how long it will last before it dries out. I'll have to figure it out with time...


It's not super pigmented (as you can see on the pictures) but I think it gives a really natural look to the brows, so if you're looking for a product that helps you to define them without going overboard, this one is for you. If you like really strong and defined brows you should check any other option, like the Dipbrow Pomade from Anastasia Beverly Hills (you can read my review of it here). I also think that is a nice product to take it with you on the bag or to travel without needing much more products, just a gel to fix the brows.

It costs around 8 € which I think is a fair price for the product. I just hope that the eyeshadow would last and it wouldn't get dry too soon. Have you tried this product? Do you fill your brows daily? Kisses!